Hello readers!
I am an engineering Junior at the Indian Institute of Technology, Roorkee. I have been recently selected as a student developer through Google Summer of Code ‘21, with TianoCore. I will be working on Developing Board Port following Minimum Platform specifications for Qemu. I am thankful to TianoCore for accepting my proposal and Nate DeSimone, who helped me enormously prepare it. I am looking forward to working with my mentors Michael Kubacki and Ray Ni. Through this blog series, I would share my progress throughout the GSoC period. I would try to write weekly but most definitely will write a fortnightly update.
Here is a brief introduction of my project.
The coding period begins on 7th June. Till then, we have community bonding period, which essentially means bonding with the community, engaging on the list, and redefining the timeline. I had my first meeting with Michael on 21st May on Teams, which was an introductory meeting where he explained the goals and necessities of the project to me.
Setting up the environment
I built OVMF and ran it with QEMU, through which I could boot to the EFI shell. I also booted Ubuntu on it further to get the debug log of the firmware boot leading up to the OS. This log would be a useful reference later to compare to when I enable OS to boot in the new board package for Qemu.
- Install QEMU, if not present already:
sudo apt-get install qemu
- Build OVMF.fd:
- For this, we first need an edk2 build capable of building UEFI images, steps for which can be found here
- We now require to choose the OVMF version to build. Since I need to build an OVMF firmware with a 32-bit PEI (IA32) and 64-bit DXE (X64) architecture for the project, I used OvmfPkg/OvmfPkgIa32X64.dsc which is compatible with both these architectures.
- Change Conf/target.txt accordingly.
- Since I am using OvmfPkg/OvmfPkgIa32X64.dsc I changed the ACTIVE_PLATFORM to OvmfPkg/OvmfPkgIa32X64.dsc , TARGET_ARCH to IA32 X64 (this means that we target both the architectures).
- Run
build cp /path/to/ovmf/OVMF.fd bios.binin the directory from where we want qemu to load bios.binmkdir hda-contentsto create a directory to use as a hard disk image for QEMU- Download an iso image of the OS you want to boot.
qemu-system-x86_64 -L . -enable-kvm -net none -cdrom ubuntu-18.04.5-desktop-amd64.iso -m 1024 -debugcon file:debug.log -global isa-debugcon.iobase=0x402- -cdrom takes the path to ISO image and
-debugcon file:debug.log -global isa-debugcon.iobase=0x402saves the debug messages in the debug.log file, which are written by default to the IO port 0x402.
- -cdrom takes the path to ISO image and
- Here is the debug log.
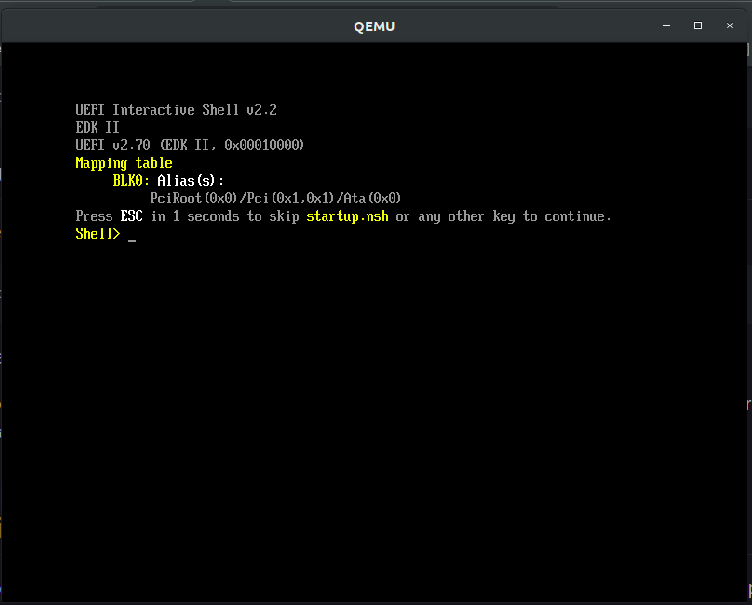
Only booting to the EFI shell:
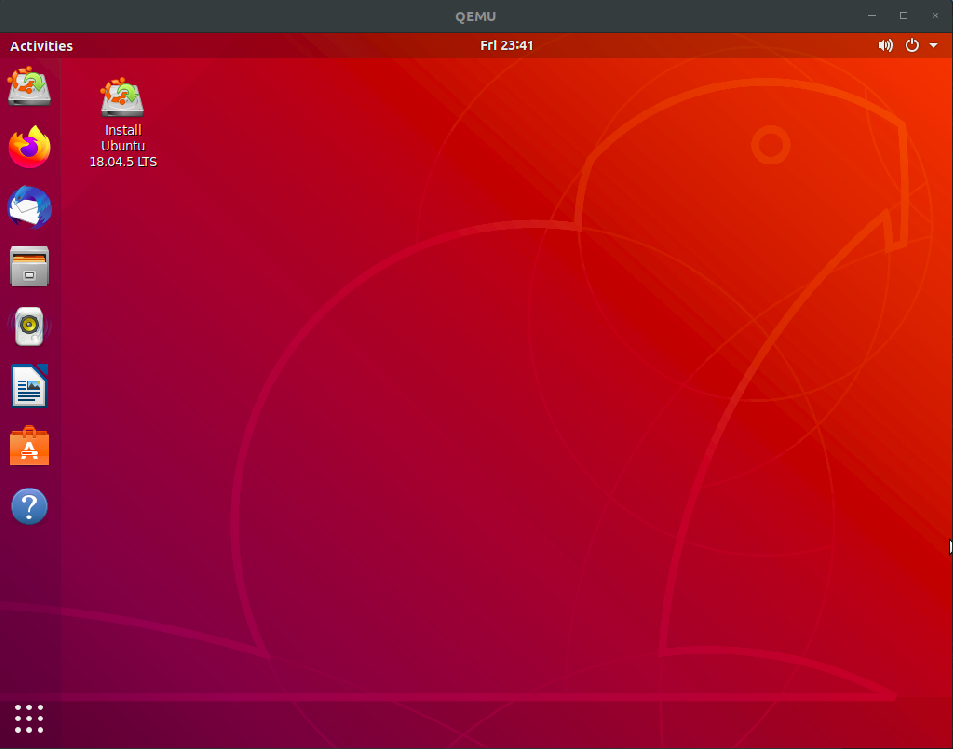
Booting the OS:
Up next
I have briefly overviewed UEFI and EDK2 concepts from the training material. I have also identified the various technologies in OvmfPkg like Bhyve and CSM, to get a high-level overview of the support OvmfPkg provided today. My next blog would be around these details together with other things I learn during the week!